Same day despatch

*Orders before 12pm mon-fri

Free Delivery

on orders over £50

Finance Available

Contact us before ordering

Trade Buyer

Apply for a trade account here

Stone Repair Kit – Clean, Repair & Seal Bundle for Marble, Travertine & Limestone – Resin Filler, 5 Tints, Cleaner & Sealer

£48.00

A complete stone repair kit for marble, travertine, limestone and other natural stone. Clean with Natural Stone Tile Cleaner No.2, fill chips, cracks and holes with resin filler tinted to match using five tints (ideal for veins and fossils), then protect the area with a 250 ml All in One water-based sealer.

Tile & Stone Repair Resin Filler with Hardener 125 ml – Chip, Crack & Hole Filler

A two-part polyester resin tile and stone repair filler for chips, cracks and holes. Choose white or cream, tint it with TileMaster Filler Tints to match your surface, and once hard, polish it in line with the existing shine on your tiles.

250 g (125 ml) tin, supplied with Part A filler and Part B white hardener.

TileMaster Filler Tints

Highly concentrated tile filler tints for colour-matching TileMaster resin filler to your tile or stone. Each 5 ml pot is enough to colour filler for up to 50 small holes the size of a 10p.

Available in black, blue, brown, green, red and yellow. Mix them together to recreate veins, fossils and tricky shades. Please note: you may receive a tube or a pot in your chosen colour.

TileMaster Filler Tints

Highly concentrated tile filler tints for colour-matching TileMaster resin filler to your tile or stone. Each 5 ml pot is enough to colour filler for up to 50 small holes the size of a 10p.

Available in black, blue, brown, green, red and yellow. Mix them together to recreate veins, fossils and tricky shades. Please note: you may receive a tube or a pot in your chosen colour.

TileMaster Filler Tints

Highly concentrated tile filler tints for colour-matching TileMaster resin filler to your tile or stone. Each 5 ml pot is enough to colour filler for up to 50 small holes the size of a 10p.

Available in black, blue, brown, green, red and yellow. Mix them together to recreate veins, fossils and tricky shades. Please note: you may receive a tube or a pot in your chosen colour.

TileMaster Filler Tints

Highly concentrated tile filler tints for colour-matching TileMaster resin filler to your tile or stone. Each 5 ml pot is enough to colour filler for up to 50 small holes the size of a 10p.

Available in black, blue, brown, green, red and yellow. Mix them together to recreate veins, fossils and tricky shades. Please note: you may receive a tube or a pot in your chosen colour.

TileMaster Filler Tints

Highly concentrated tile filler tints for colour-matching TileMaster resin filler to your tile or stone. Each 5 ml pot is enough to colour filler for up to 50 small holes the size of a 10p.

Available in black, blue, brown, green, red and yellow. Mix them together to recreate veins, fossils and tricky shades. Please note: you may receive a tube or a pot in your chosen colour.

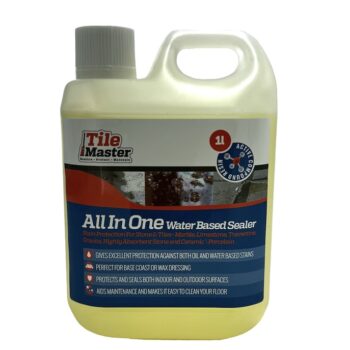
All in One – Water Based Sealer

TileMaster AllinOne Sealer is perfect  for Natural stone, ceramic and porcelain tiles

  • Gives excellent protection against both oil and water based stains
  • Laboratory certified as Safe for food preparation areas and worktops
  • Protects and seals both indoor and outdoor surfaces
  • Easy to apply and Ready to USE


Natural Stone Tile Cleaner 2

TileMaster Cleaner No.2 is a pH neutral, eco friendly, all-purpose professional biodegradable tile and grout cleaner, which is safe to use as an everyday cleaner and maintainer.

  • Deep clean natural stone and grout
  • Excellent on removing grime and grease
  • Cleans without tarnishing other surfaces
  • 100% Biodegradable


Purchase this product now and earn 40 Points!

7 in stock

- +

Description

Stone Repair Kit – Clean, Repair & Seal Bundle

Natural stone needs a gentle cleaner, a filler that can be colour-matched to veins and fossils, and protection afterwards. This kit brings all three together for travertine, marble, limestone and other stone floors and walls.

What’s in the box

Ideal for

  • Travertine holes and pits
  • Chips and cracks in marble and limestone
  • Natural stone floors and wall tiles

Colour-matching tip

Most warm-toned stones such as travertine and limestone are cream or beige. Add a little brown tint to the white filler to make cream shades, then use tiny amounts of the other tints to match veins and fossils.

How to use

  1. Clean the damage. Remove any loose debris, dirt and grease from the chip, crack or hole, then vacuum away the dust.
  2. Mask around it. Apply good-quality masking tape around the repair so excess filler stays off the tile.
  3. Tint the filler (optional). Take enough filler (Part A) for the repair and mix in a tiny amount of tint at a time until the colour matches your tile.
  4. Add the hardener. Add hardener (Part B) at about 3% – roughly a pea-sized amount of hardener to a golf-ball-sized amount of filler – and mix thoroughly. You then have about 15 minutes before the mix becomes unworkable.
  5. Fill and level. Press the filler firmly into the damage and level it with the masking tape. Very deep areas may need a two-stage application.
  6. Trim flush. After a few minutes, once the filler has started to harden, remove the tape and scrape off the excess with a clean, sharp blade so the repair sits flush with the tile.
  7. Leave to harden. Once the filler is completely hard (about 1 hour), a floor can be walked on and used as normal. Curing time can vary with the amount applied and site conditions.

Once the repair has fully hardened, apply the sealer following the instructions on the sealer label.

Safety

The resin filler contains styrene. It is a flammable liquid and vapour, causes skin irritation and serious eye irritation, is suspected of damaging the unborn child and causes damage to organs through prolonged or repeated exposure. Keep away from heat, sparks and open flames – no smoking. Wear protective gloves (nitrile or neoprene) and eye protection, use in a well-ventilated area and keep out of reach of children. Please read the Safety Data Sheet before use.

Repairing porcelain instead? See the Porcelain Clean, Repair & Seal Bundle or all tile repair kits.

Frequently asked questions

Which stones can I repair with this kit?

Marble, travertine, limestone and other natural stone. The filler also works on terrazzo and quarry tiles.

How is this different from the porcelain Clean, Repair & Seal kit?

The stone kit includes Natural Stone Tile Cleaner No.2 instead of the Ceramic & Porcelain Cleaner No.1. The filler, tints and sealer are the same.

My travertine is cream, not white – will the filler match?

The kit comes with white filler. Adding a little brown tint turns it into a range of cream shades, and the other tints help you match veins and fossils.


Product Data

Weight 2 kg

Tile & Stone Repair Resin Filler with Hardener 125 ml – Chip, Crack & Hole Filler

Colour

TileMaster Filler Tints

Tint Colour

TileMaster Filler Tints

Tint Colour

TileMaster Filler Tints

Tint Colour

TileMaster Filler Tints

Tint Colour

TileMaster Filler Tints

Tint Colour

All in One – Water Based Sealer

Size

250ml

Natural Stone Tile Cleaner 2

Size

250ml Ready to Use

How To Use

METHOD
Always wear gloves, Stone repair resin is harder when set than most stone and is particularly difficult to get off
the skin when set.
1. Thoroughly clean the hole or crack ensuring you remove any loose debris, dirt or loose and then
vacuum to remove any remaining dust.
2. Tape around the hole or crack using a good quality masking tape. This stops any excess filler going
on the tile.
3. Remove enough Stone Resin (Part A) to fill the hole and place on a piece of old cardboard from the tin.
4. Next remove some Hardener (Part B) and place next to your Stone Resin (Part A). You want 3%
hardener to 100% Stone Resin. We normal say a golf ball size of Resin needs a Pea size of Filler. Mix these
both together to start the reaction. You now have about 15mins before the mix becomes unworkable.
5. Fill the hole or crack using the Stanley blade, and then scrape off any excess so that the filled area is
level with the masking tape. (Note very deep areas may require a two stage application).
6. Leave the filler for a few minutes to harden. Once this happen remove the masking tape and scrape off
the excess using the clean fresh Stanley blade to make the fill flush to the stone.
7. Once the filler is completely hard after 1 hour, the floor is fine to walk on and can be used as normal.

Safety

SDS Download  

Label Download

pH  NA

WARNINGS

  • H302: Harmful if swallowed.
  • H319: Causes serious eye irritation.
  • P102: Keep out of reach of children.
  • P233: Keep container tightly closed.
  • P262: Do not get in eyes, on skin, or on clothing.
  • P264: Wash skin thoroughly after handling.
  • P301+330+331: IF SWALLOWED: rinse mouth. Do NOT induce vomiting.
  • P302+350: IF ON SKIN: Gently wash with plenty of soap and water.
  • P305+351+338: IF IN EYES: Rinse cautiously with water for several minutes. Remove contact lenses, if present and easy to do. Continue rinsing.
  • P333+313: If skin irritation or rash occurs: Get medical advice.


CONTAINS


SUBSTANCE   Codes of class and hazard category Codes of hazard


Quantity
CAS: 100-42-5

EINECS: 2002-851-5

n. Index: 601-026-00-0

n. REACH registration: 01-2119457861-32-XXXX


Flam. Liq. 3

Asp. Tox. 1

Acute tox. 4

STOT RE 1

STOT SE 3

Eye irrit 2

Skin irrit 2

H226 – H361d – H332 – H372 (auditory organ) – H315 – H319 10-20%

Surfaces

Natural Stone Surfaces

By Type

1.Marble

•Known for its luxurious veining and elegance.

•Commonly used in countertops, flooring, and wall cladding.

2.Granite

•Extremely durable with granular patterns.

•Popular for countertops, flooring, and outdoor applications.

3.Limestone

•Soft and warm-toned, often used in flooring and facades.

4.Travertine

•A subset of limestone with unique porous textures.

•Frequently used in tiles and pavers.

5.Slate

•Fine-grained, layered stone available in various earthy tones.

•Ideal for flooring, roofing, and wall cladding.

6.Sandstone

•Characterized by its grainy texture and warm hues.

•Used for pavers, wall cladding, and sculptures.

7.Quartzite

•Extremely hard, often mistaken for marble or granite.

•Suitable for countertops, flooring, and walls.

8.Onyx

•Translucent and striking, often used as a statement material.

9.Soapstone

•Soft, smooth texture with natural heat resistance.

•Used for countertops and sinks.

10.Basalt

•Dark, fine-grained volcanic rock.

•Ideal for minimalist and contemporary designs.

11.Flagstone

•Flat stones used for outdoor pathways, patios, and landscaping.

By Finish

1.Polished Finish

•High-gloss, reflective surface.

•Highlights the natural colors and veining of the stone.

2.Honed Finish

•Smooth, matte surface with low reflectivity.

•Ideal for softer, understated looks.

3.Tumbled Finish

•Softened edges and a weathered appearance.

•Used for rustic or vintage aesthetics.

4.Brushed Finish

•Textured surface achieved with brushes.

•Adds a natural, worn feel.

5.Flamed Finish

•Textured, rough surface created with high heat.

•Common for outdoor and slip-resistant applications.

6.Leathered Finish

•Softly textured surface, less glossy than polished.

•Enhances the stone’s natural character.

7.Bush-Hammered Finish

•Dimpled surface created by a hammering process.

•Ideal for high-traction areas.

8.Split-Face Finish

•Rugged, uneven surface with a natural, raw look.

•Popular for feature walls and cladding.

9.Sandblasted Finish

•Slightly textured and matte surface created with sandblasting.

•Often used for outdoor applications.

10.Antiqued Finish

•Mimics aged stone, with a soft and weathered appearance.

11.Natural Cleft Finish

•Surface split along natural layers for a rough texture.

•Common in slate and flagstone.

Specialized Natural Stone Looks

1.Veined Patterns

•Found in marble, quartzite, and onyx for dramatic appeal.

2.Book-Matched Stone

•Symmetrical patterns created by matching slabs.

3.Waterfall Edge

•Extends the stone’s veining down the sides for a seamless look.

4.Pebble Stone

•Rounded stones embedded in concrete or resin.

•Used for shower floors, pathways, and decorative accents.

5.Cobblestones

•Small, rounded stones for pathways and streets.

Benefits

Add a Colour Tint

add a colour tint to match any colour you like

Add brown Tint to the white filler to make any shade of cream

Results

Repaired using a combination of Filler and Colour Tints After


Repaired using a combination of Filler and Colour Tints – Before


Hole Repair – Before
Hole Repair – After


Additional Info

Check out the filler tints that can be used to change the colour of your filler to match you stone

Reviews (0)

Share your thoughts!

Let us know what you think...

What others are saying

There are no contributions yet.

×

Login

Register

A link to set a new password will be sent to your email address.

Continue as a Guest

Don't have an account? Sign Up

Product Enquiry

Product Enquiry

Scroll to Top